April 24, 2024

MyNature Animal Tracks MyNature Tree Guide MyNature Animal Tracks MyNature Fishing App

Archives for April 2012

Make Your Own Miniature Greenhouse

Some of my blogs surely do stray away from the app side of things and today’s miniature greenhouse entry is no exception. I’ve always wanted to build my own full size greenhouse and now that the kids are grown and heading their own way I have a lot of time on my hands to do just that.  Over the years though I’ve made due quite nicely with a miniature version that fits right on my windowsill and the best part is the cost …….. nothing!!!.  Once you have your seeds started and they’ve poked through the soil grab yourself a clear plastic water or soda bottle. You can use a full size liter bottle or if space is at a minimum use the regular 16 ounce bottles. You can always start them off in the smaller one and transfer the pot into the bigger bottle later on if they get to big.

The first thing you want to do is remove the label.  Next, measure up about 1 1/2 inches from the bottom. Take a sharp knife or utility knife and cut a straight line around the bottle at the   1 1/2  inch mark.  Don’t throw the bottom away your going to use this to hold your pot in.  Place your pot in the bottom piece and then gently slide the top part of the bottle over the bottom piece.

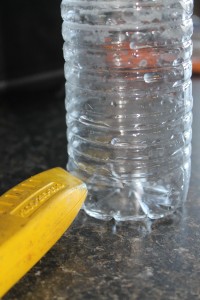


If your having trouble getting the top of the bottle to slide over the bottom use a pair of scissors to cut three vertical lines in the bottom piece, your top should slide over easier now and still fit snugly.  Unscrew the cap or slide the bottom back off if you need to water the plants. I place a little gravel in the bottom of my bottle for drainage and it also lets the plant sit flatter and not as prone to tip from side to side.  All that’s left now is to place your bottles on the windowsill and watch your plants grow.  When it’s time to transplant to the garden save those bottles for next season, they’ll come in handy to start all over again.
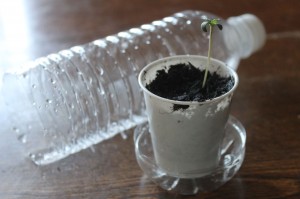


I’m sure you’ll enjoy your miniature greenhouse, there’s a lot of satisfaction in starting your own plants from seedlings.


Happy gardening & good luck with that green thumb!!

Building a Bluebird Box

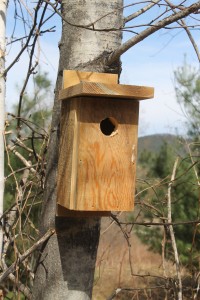
One of the most rewarding ways to connect with Nature and give something back is to construct  nesting boxes. This week were going to be taking a look at Bluebird boxes. Even though it’s a little late in the year since most birds have already been busily building their nest, I’ll be posting some “how-to’s”  on building nesting boxes for a few different species of birds that reside here in the Adirondacks and over much of North America. Keep in mind you don’t have to be a master builder to do any of these projects. A handsaw, hammer, finish nails and a power drill are more than sufficient for our needs. Power tools like a chopsaw and table saw  make the job that much more easier, but certainly not required. The first thing you’ll need is a  piece of 1 x 6 lumber. Pine is the cheapest to buy, stay away from pressure treated lumber as the preservatives in the wood could be toxic to the nesting birds.  The plans below are for a flat roofed box. You can make a pitched roof  if you choose but for the sake of ease in cutting we’re doing all square cuts. Besides, birds don’t care if the roof is pitched, the important thing is the overall interior size, the hole size and distance from the floor to the hole and where the box is placed.

Materials you’ll need:

  • (1) 5 foot piece of 1 x 6 pine or cedar (natural)
  • approximately 16 exterior 1 1/2 inch screws or  nails
  • (2) 3 inch mounting screws (exterior)
  • (1) 4 inch  butt hinge
  • 1 1/2 inch paddle bit (for entrance hole)
  • 1/4 inch drill bit (for ventilation holes)
  • electric or battery drill
  • hand saw or electric chopsaw

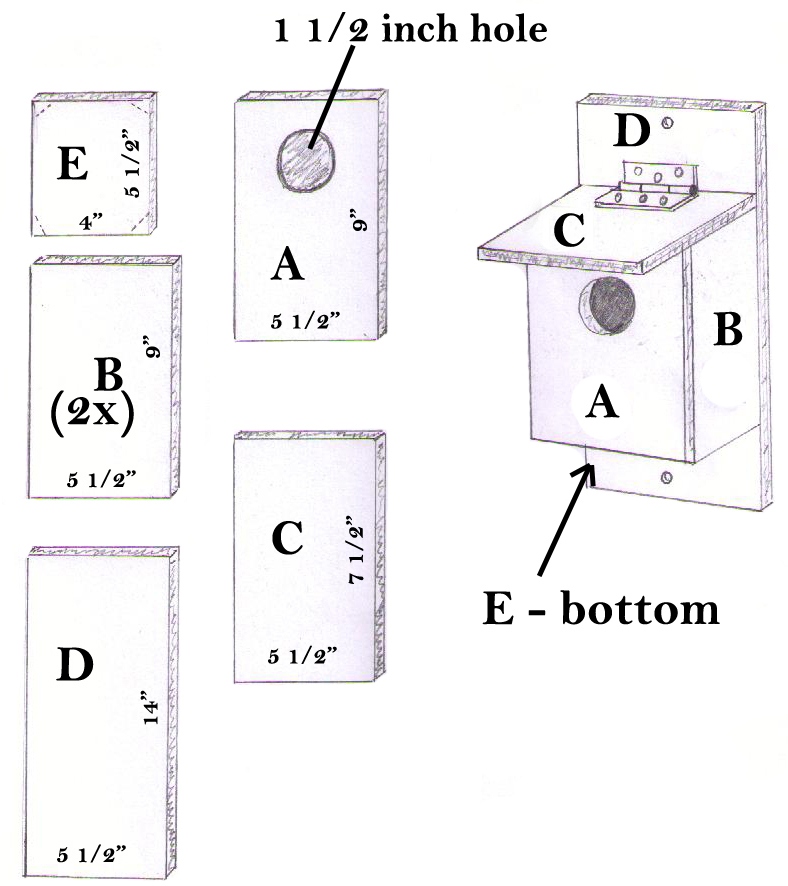
Once you’ve secured a piece of lumber  you want to make the following cuts.

  • 1 floor piece 4 inches  wide by 5 1/2 inches long
  • 2 side pieces 5 1/2 inches wide by 9 inches tall
  • 1 front piece 5 1/2 inches wide by 9 inches tall
  • 1 back piece 5 1/2 inches wide by 14 inches tall
  • 1 roof piece 5 1/2 inches wide by 7 1/2 inches long

Once you cut the floor piece clip the corners back 1/4 inch at a 45 degree angle to allow for ventilation and water to drain out should any get inside. Assemble the 2 sides to the floor piece  on the 5 1/2 inch profile then attach the front panel over the sides. Everything should fit flush. Next attach the partially assembled box to the back panel. Leave about 1 1/2 inches of the back panel sticking down below the floor. This will allow you a surface to attach to the tree later on. Now you can put the roof panel in place, secure this with a 4 inch hinge. You can pick up the hinge at any hardware store  for about $3 bucks. You’ll get two hinges in the pack, save the second one for another nest box. The hinge make cleaning each year a lot easier than using screws or pulling nails to get inside.  Once you have the box all assembled  it’s time to drill your entrance hole. This hole will  be 1 1/2 inches wide. Hook your tape measure on the top of the front panel and measure down 1 3/4  inches and measure from the side over 2 3/4 inches .  These two marks will be the center of your hole.  You’ll need a little ventilation on the sides of the box as well. Just under the roof panel on each side drill (2) 1/4 ” wide holes about 3/4 of an inch down.

Now that your box is built you’ll want to paint or stain it … DON’T … It’s best to just leave the box natural with no sealer or paint. Paints and stains can be toxic to birds. Pine can last several years untreated, cedar will give you a longer lasting product but is 3 times more expensive than pine. If you absolutely feel the need to preserve the wood then apply a coat of Raw Linseed Oil, use Raw Linseed Oil only, not boiled; Boiled Linseed Oil contains toxins. Linseed oil takes along time to dry so you should only apply a coat to the exterior in the fall once the birds have left.  Once the linseed oil has soaked into the surface it makes for a very durable wood. Still after saying that it’s a much better idea to leave the wood natural.

Just as important as the dimensions of the house,  maybe even more important, is the placement of the nest box. You can have the nicest Bluebird box but if it isn’t in the right place then you won’t have any Bluebirds nesting in it. Bluebirds prefer open areas with short, low growing vegetation; pastures, mowed lawns, cut fields are all good examples. You should screw the house to a pole, fence post or tree at eye level. If possible place the nest box on the East side of the post or tree to prevent it from overheating inside. Exposed to too much sun the temperature inside the nest box can rise to deadly levels.  That’s one good reason to use natural pine as the light colored wood reflects the sunlight rather than absorbing it as dark colors do. If your placing more than one nest box in the same area make sure they’re at least 100 – 150 yards apart. Bluebirds like most animals are territorial and need their own space.

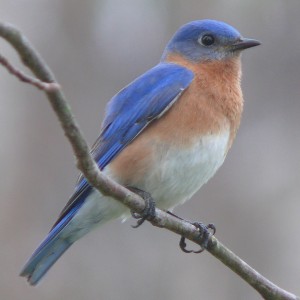
Now that it’s built and hung, it’s time to sit back, relax and give yourself a pat on the back for helping out Mother Nature. If you’re lucky, you may just be rewarded with a beautiful pair of nesting Bluebirds next spring.  Well done!!

Wintergreen

Late winter hikes are often void of much color as winter still has it’s grip on many plants.  If you keep a close eye to the ground though you may find a beautiful little plant called Wintergreen, Gaultheria procumbens peeking out from under the snow.  Wintergreen doesn’t usually get over 6 inches tall so it can be easily overlooked.  The one thing that should grab your attention are the deep green colored leaves. against the drab winter landscape. The leaves are evergreen, ovate to elliptic in shape from 3/4 of an inch to 2 inches long. If you were to crush a leaf you would notice the distinct odor of wintergreen. It  can be found growing in roughly half  of North America  from the central states North to Maine and up into Canada.  The small red berries of Wintergreen are edible with a minty flavor.  Like most plants there are a variety of names Wintergreen is known by; Canada tea, checkerberry, deerberry, ground berry, hillberry, mountain tea, partridge berry, spiceberry and teaberry.


Happy Hiking !!